
This guide is built to be used, not read once. It catalogues the girls dress quality defects that turn up most often in production and inspection, and each entry answers four questions in the same order: what the defect looks like on a real garment, why it happens in the factory, what prevents it at the source, and what a buyer can verify without a laboratory.
Use the pages in three ways. Before production, send the relevant ones to your supplier with the purchase order, so the prevention line becomes an instruction rather than an assumption. During production, hand them to whoever runs your inline inspection or your third-party quality inspection, so the photographs come back against a known reference. After delivery, use the buyer verification line as a script for the first carton you open, because defects are cheapest to argue about while the goods are still packed.
A companion article, the girls dress quality check checklist, answers what to check and in what order. This guide answers a different question: what each girls dress defect actually is, why it happens, and how it is prevented, at the cutting table, the machine, the finishing station and the packing bench.
One note on scope. Where a defect sits on decoration — embroidery, beads, appliqué, bows — how those techniques are built correctly is covered in our breakdown of girls dress embellishments. Here the focus is how decoration goes wrong.
Reading the Four Fields
Each entry is a fixed card, so you can compare defects without relearning a format halfway through.
What it looks like. A physical description, written so someone who has never seen the defect recognises it in a photograph or in their hands.
Why it happens. The process cause, not the symptom. Most of these defects are decided before the garment is sewn, at the pattern table, the spread, the dye lot or the fabric inspection.
Factory prevention. The control that removes or reduces the defect. Where a control costs money, it is said plainly, because a buyer spending on quality needs to know what the spend buys.
Buyer verification. What you can check with your eyes and hands, using nothing beyond a measuring tape, good light and a flat surface.
The Fifteen Defects, Plate by Plate
Uneven hem
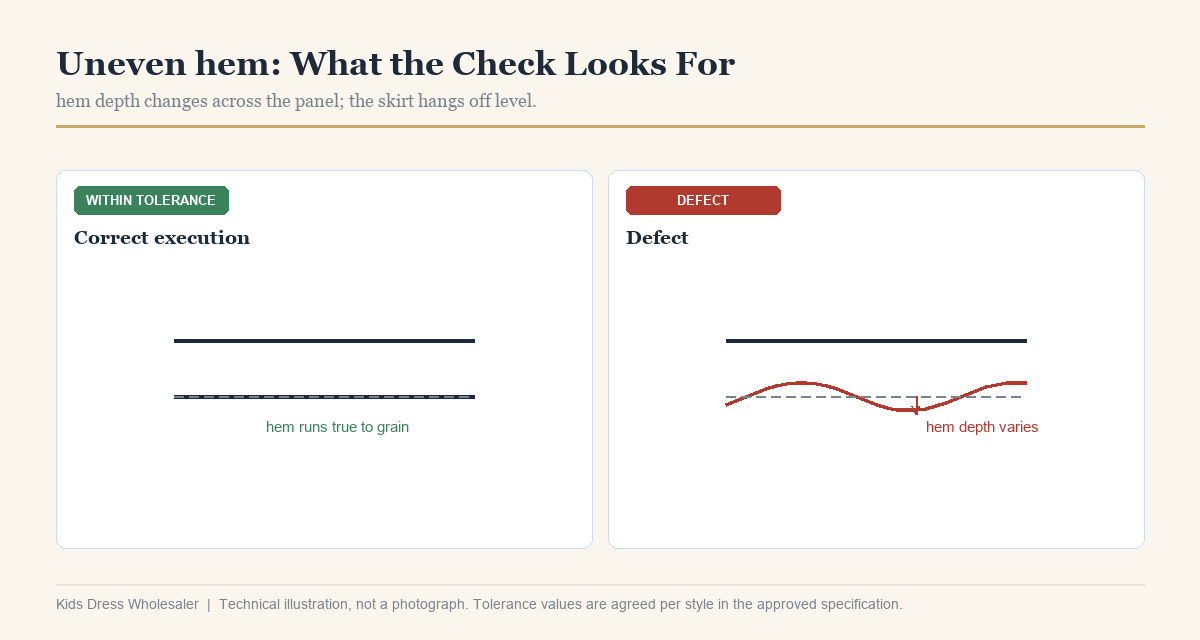
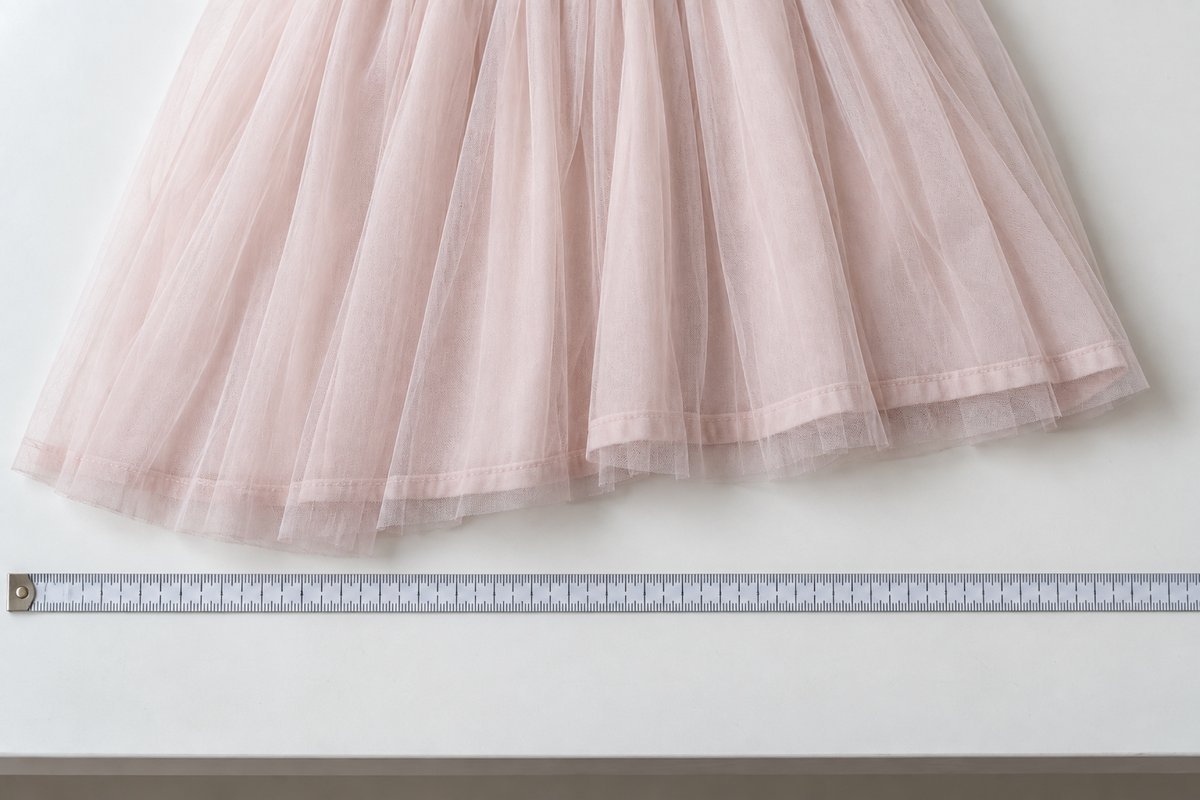
What it looks like. The finished length varies around the skirt. Measured from the waist seam to the hem edge, one section sits lower than another, and on a full tulle skirt the hem that should read as a clean circle turns wavy, stepped or sloped. On a two-layer skirt, the outer layer and the lining may end at different depths, and hanging the dress makes it worse.
Why it happens. Circular skirts have areas of different grain direction, and the bias sections stretch during handling, sewing and hanging. A hem cut flat on the table and stitched before the skirt has relaxed loses length in some places and keeps it in others. Uneven gather tension across a tulle waist and inconsistent feed where the skirt meets the bodice shift the hem after the fact.
Factory prevention. Let the skirt hang relaxed before the hem is marked, and mark it on a form or with a gauge from the waist seam rather than the floor. Handle bias sections without pulling. Match the hem finish to the fabric: rolled hem on tulle, blind hem on a stable woven, faced hem on heavy satin. Keep all panels of one skirt together so they relaxed under the same conditions.
Buyer verification. Measure skirt length from the waist seam at several points on one garment, not once. Hang the dress before judging the hem, and measure again after a wash if the care instruction allows. Compare it against your approved sample on a form, then step back several metres and look at the hem line as a whole, because a wavy line reads more clearly at distance than under a magnifier.
Seam puckering
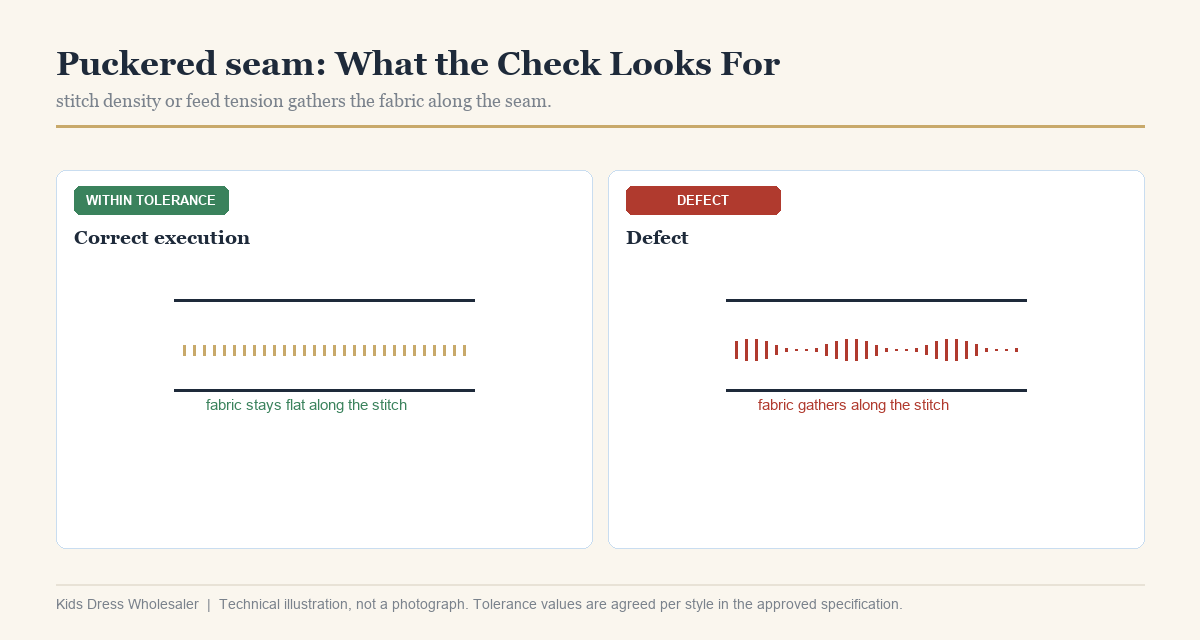
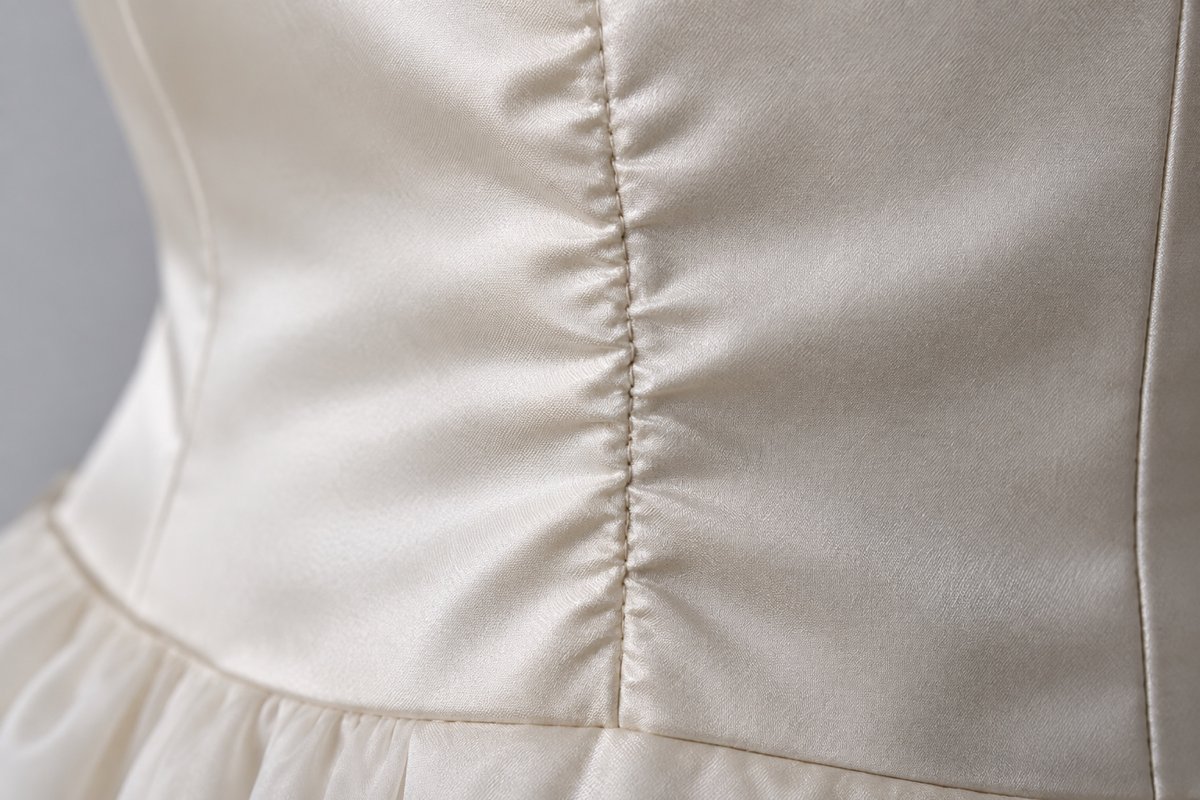
What it looks like. The seam line is rippled. Fabric on both sides of the stitches draws into small waves, and the seam will not lie flat even after pressing. It appears most often on side seams, waist seams, armholes and bodice panel lines. On a light shell with a darker lining, the ripples show through and read as texture across the whole skirt.
Why it happens. Puckering is a tension problem, and it can come from either side of the machine. Stitch density too tight for the fabric, thread tension set high, or a needle too heavy for the goods pulls the cloth into the stitch line. A presser foot that pushes fine or slippery fabric ahead of the needle does the same. Where a stable lining meets a stretchy shell, one side grows and the other does not.
Factory prevention. Run a sew-off on the actual fabric before bulk and set thread tension, stitch density, needle size and foot pressure from it. Reduce stitch density on fine goods, use a walking foot on slippery fabric, and match thread weight to the cloth. Press each seam as it is sewn rather than only at the end of the line. Where two fabrics meet in one seam, wash-test them together before cutting.
Buyer verification. Look at the seam from inside as well as outside, and run a finger along it to feel for waves. Puckering can be pressed flat and return after washing, so judge the seam after the finishing step rather than before. Check a garment from the middle of the run, not only the one on top of the carton, and confirm you are looking at puckering rather than skipped stitches along the same line.
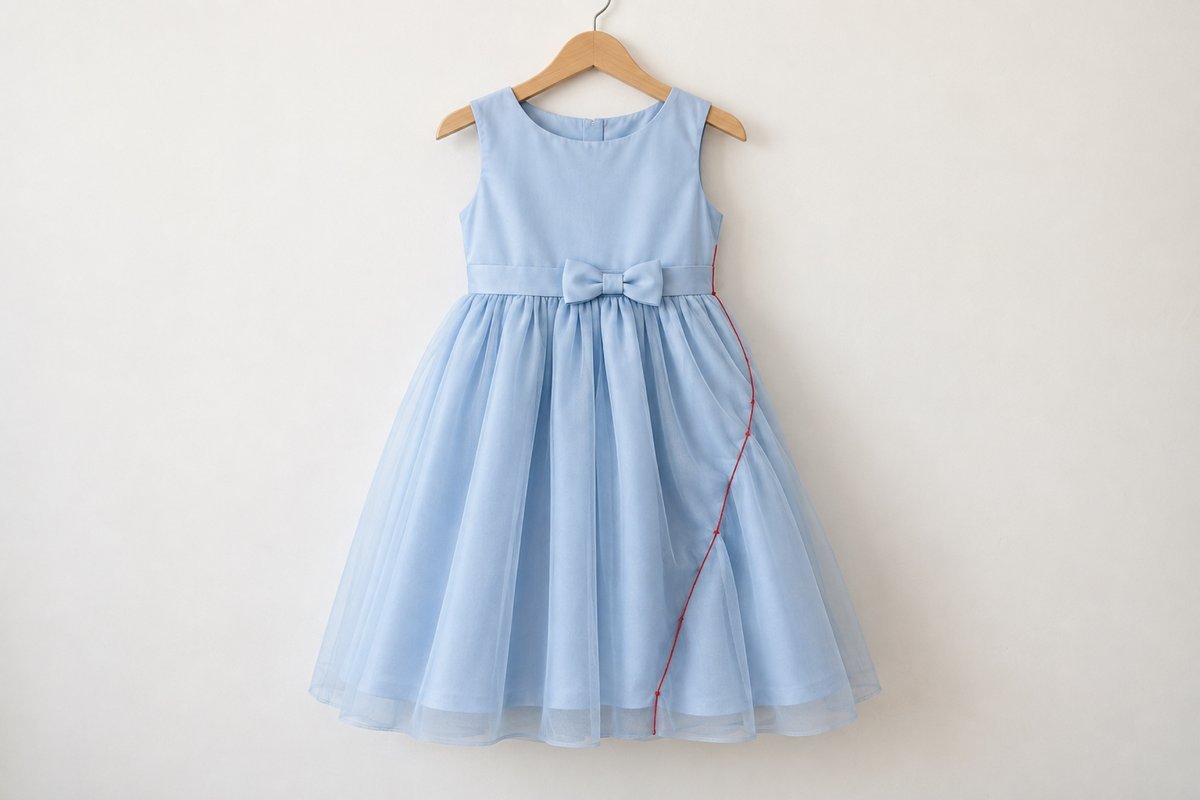
Twisted side seam
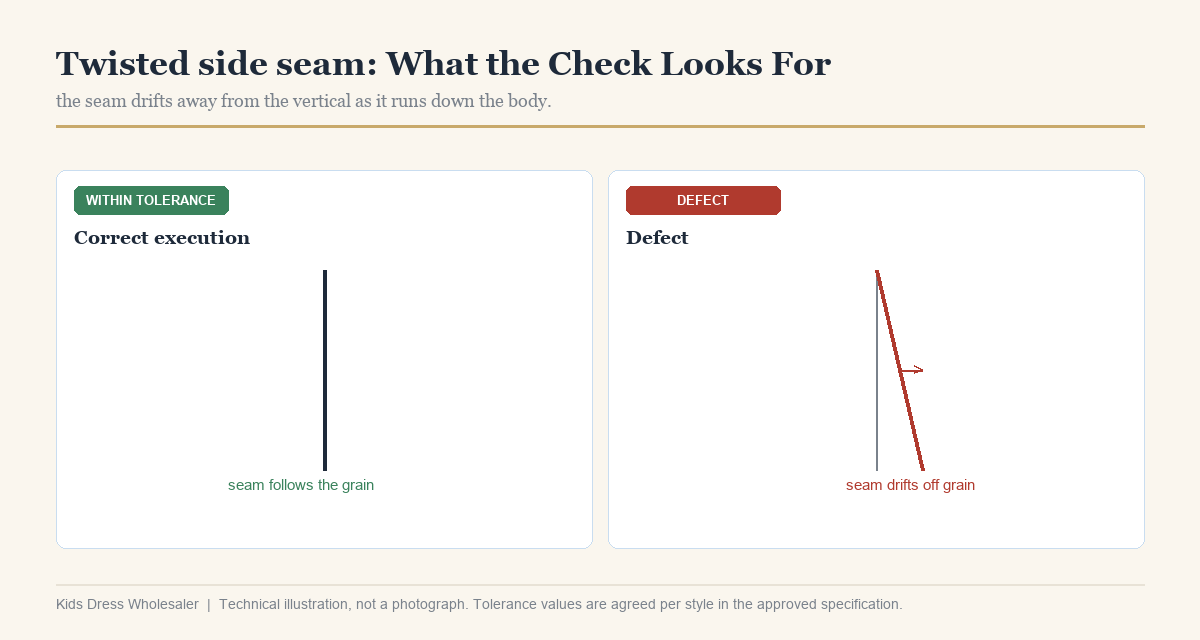
What it looks like. The side seam spirals around the body instead of falling straight from the armhole to the hem. On a hanger the dress looks slightly turned, and on the body the seam drifts toward the front or the back as it travels down. It is often invisible when the dress lies flat on a table and obvious the moment it is worn or washed.
Why it happens. Twisted seams are usually a fabric fault rather than a sewing fault. A roll that is skewed, or a fabric that skews after washing because of twist in the yarns, carries that lean into every panel cut from it. The same result comes from a marker aligned to the cut edge rather than to the grain, from an uneven spread, or from one side seam sewn under more tension than the other.
Factory prevention. Inspect rolls for skew before spreading and relax them first. Align the marker to the grain or course line and verify it on the fabric, not on the selvedge. Where a fabric is known to skew after washing, correct the cutting angle to compensate or choose a different ground fabric for styles with prominent panel lines. Sew both side seams at the same low tension, and run a sewn, washed panel test before bulk.
Buyer verification. Lay the garment flat and follow each side seam from armhole to hem. Put it on a form and check both sides again, because one seam can twist while the other does not. Wash one piece if the care instruction permits and re-check. If skew is confirmed on a single garment, treat the whole lot as suspect, since skew comes from the roll rather than the operator.
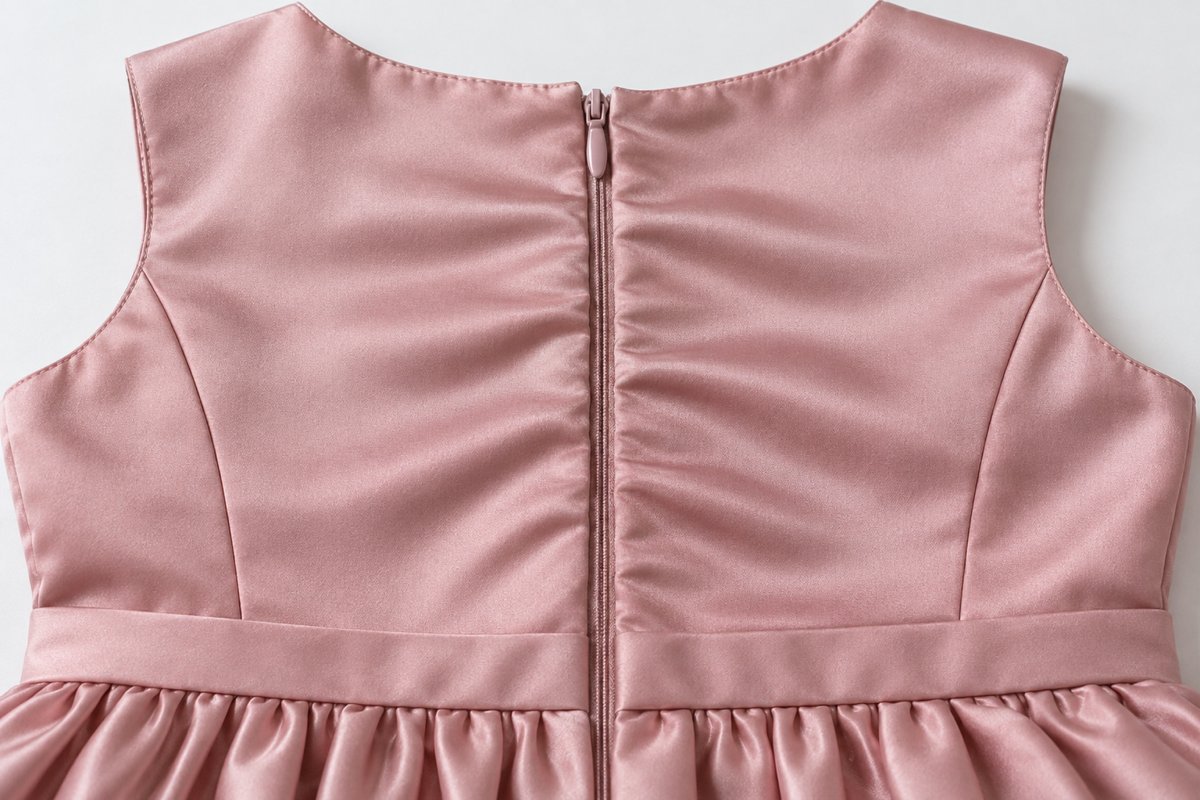
Zipper wave
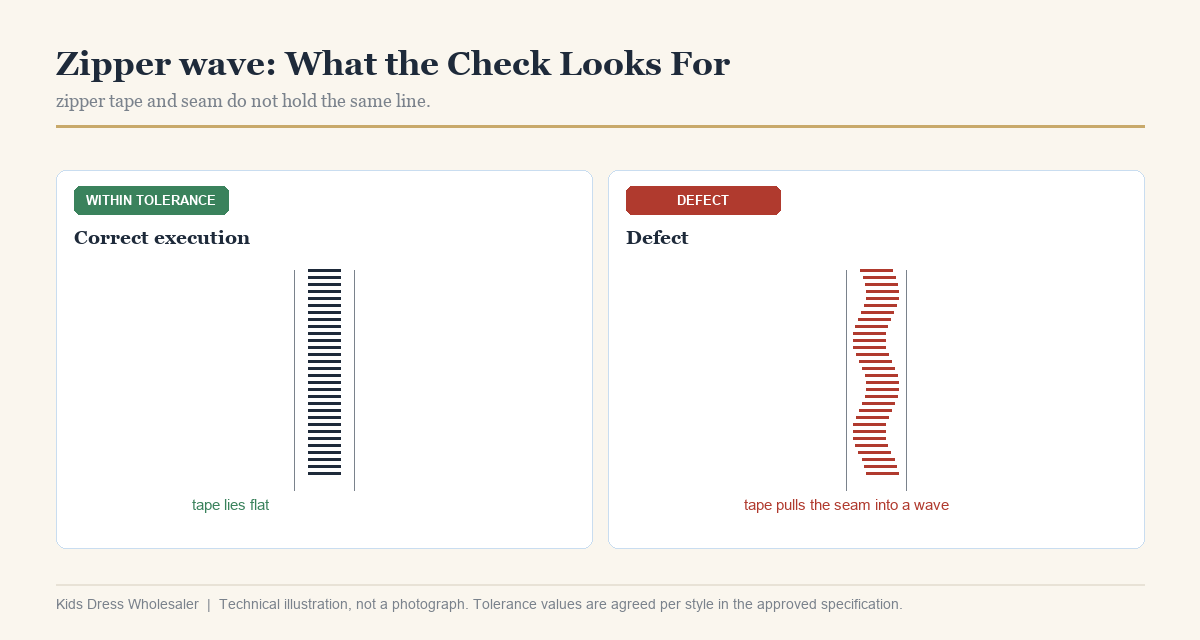
What it looks like. The back opening does not lie straight. Either the zipper ripples along its length while the fabric stays flat, or the zipper is straight and the fabric on both sides waves away from it. The centre back line looks crooked on a form, the opening bulges at the waist, or the top of the zipper gapes away from the neckline.
Why it happens. A zipper tape is stable and most dress fabrics are not, so the two behave differently under the same needle. Installing a zipper into a seam that has already stretched, or without stabilizing it first, lets the fabric move while the tape stays put. A zipper length that no longer matches the opening after relaxing produces a bulge or a gap, and a fabric that shrinks in the wash pulls the opening out of line later.
Factory prevention. Stabilize the seam where the zipper sits, with stay tape, a strip of fusible or an interlining matched to the fabric. Relax or pre-shrink the fabric before attaching the zipper, and confirm the zipper length against the opening after relaxing rather than before. Use a zipper foot, reduce foot pressure, and sew without stretching either side. Test the operation on a sewn panel and wash that panel before bulk.
Buyer verification. Close the zipper and lay the dress flat, then look straight down the line of the opening. Repeat on a form. Open and close the zipper in one continuous motion and feel for tight spots. Check both ends specifically, looking for gaping at the top and bulging at the base. Where the care instruction allows it, judge the zipper after the first wash, when a shrinkage-driven wave appears.
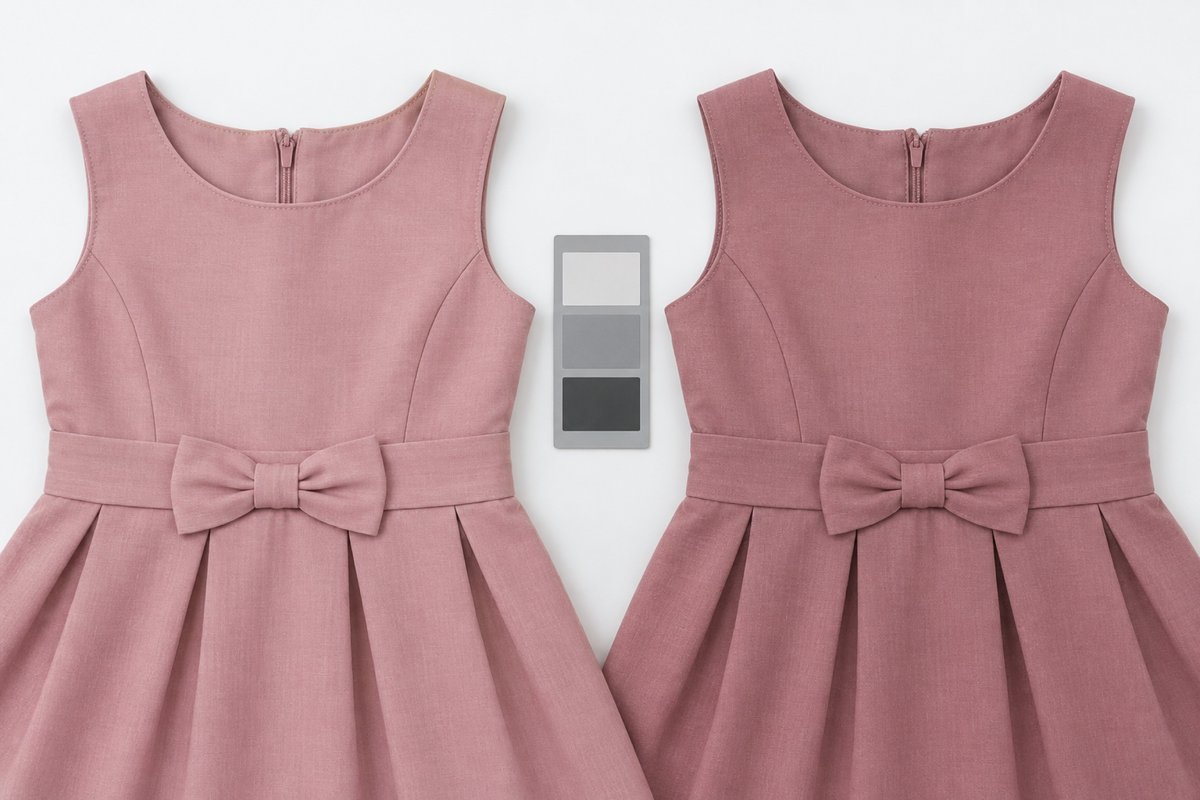
Shade variation
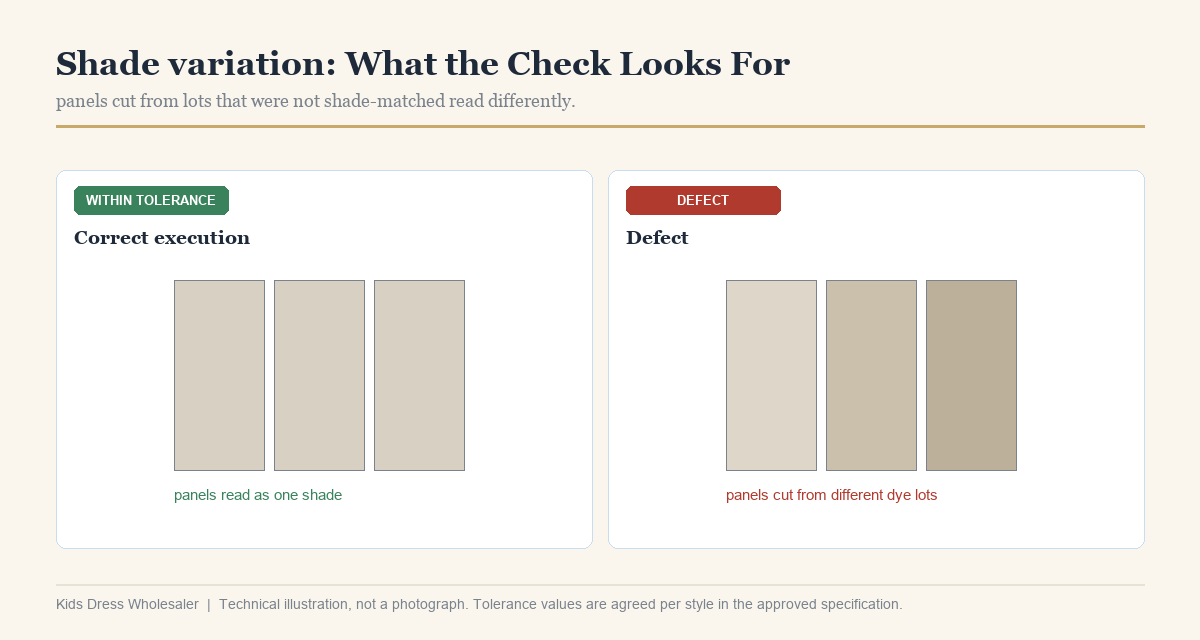
What it looks like. Two parts of the same garment do not match. The bodice reads darker than the skirt, the lining is visibly different from the shell, or the tulle layers sit at different depths of tone. Shade variation also appears between garments: a rack of identical dresses in one size run shows a clear colour step from piece to piece, which is far more obvious on a rack than on a single dress.
Why it happens. Components dyed in separate lots rarely match exactly, and a shell and lining of different fibre types take dye differently by nature. Rolls carrying two lot numbers can end up cut into one dress. A component can be dyed in one lot and pressed, washed or finished under different conditions from its neighbour. Prints add their own batch variation on top of the ground colour.
Factory prevention. Record a lot number on every roll and cut one dress from a single lot where the quantity allows. Shade-band the rolls before spreading so pieces for the same garment come from visually matching goods. Keep the approved bulk standard at the cutting table rather than in an office, approve each lot against the retained standard before cutting starts, and check assembled panels rather than loose pieces.
Buyer verification. Compare dresses side by side rather than one at a time, and judge them in daylight instead of under store lighting. Within a single garment, compare shell against lining, bodice against skirt and every trim against the ground. Pull pieces from several cartons, since a lot split is often shipped across more than one box, and look at the rack from a few metres away before you look closely.
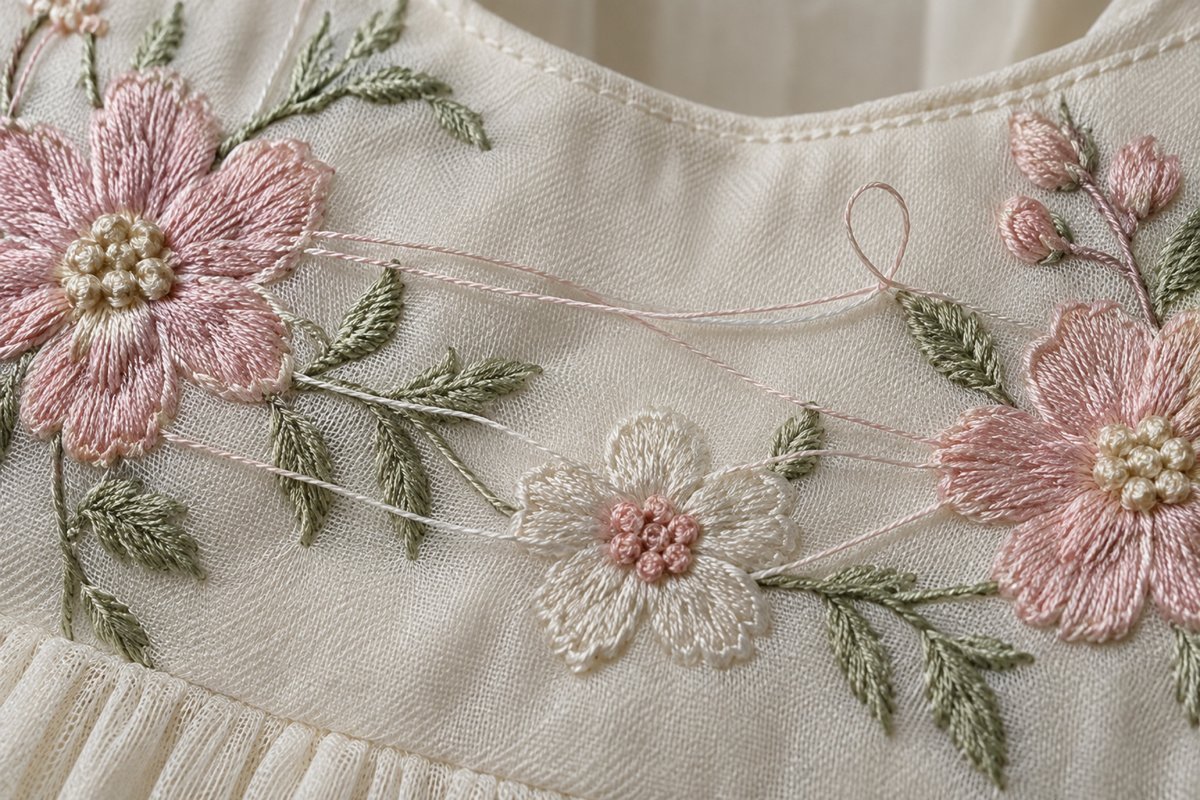
Loose embroidery
What it looks like. Thread loops standing above the embroidered surface, jump threads running between elements, stitching that was never tied off, and edges lifting at the tip of a petal or the end of a letter. Seen from directly above it can look acceptable. Viewed at a low angle or touched, the lifted thread shows immediately, and it catches on whatever passes near it.
Why it happens. Insufficient backing or stabilizer for the density of the design lets the fabric move under the needle so the stitches sit proud. Thread tension set for another fabric, a needle too large for the ground cloth, or a file digitized without accounting for the stretch of tulle or knit causes the same result. Embroidery crossing a seam or a gather line loosens as the garment moves, and trimming is often the missing step.
Factory prevention. Run a sew-off with the actual fabric, backing and stabilizer, and judge the embroidery after trimming and after a wash. Specify trimming, tie-offs and the inspection step in the work instruction instead of leaving them to routine. Digitize for the ground fabric, particularly where embroidery crosses a gathered waist or a seam. Match needle and thread to the cloth, and place the design where it is not fighting constant movement.
Buyer verification. Run a finger across the embroidery in both directions, because lifted threads catch. Turn the garment inside out and look at the back of the embroidery for untrimmed jump threads and a stable backing. Tug the end of a stitch line gently to see whether it is tied off. Look at the ornament from a low angle, where standing loops are easiest to see, and repeat the check after a wash where the care instruction allows.
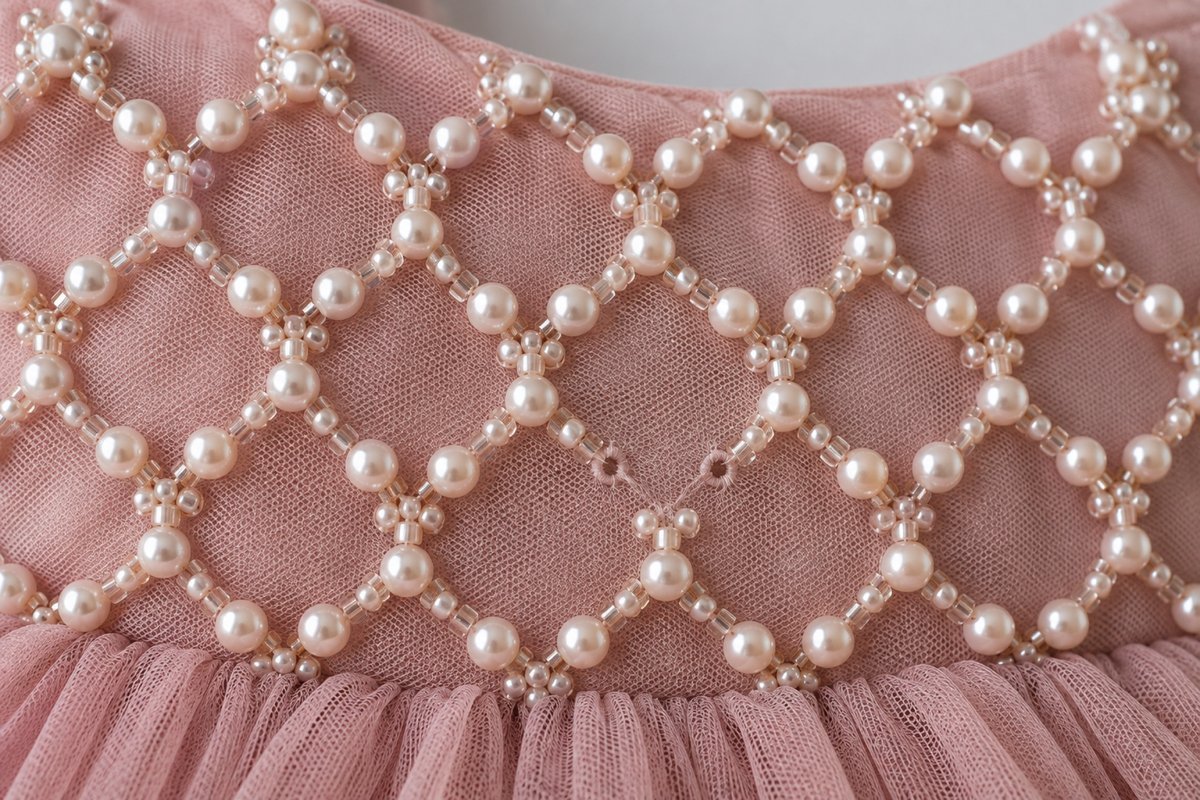
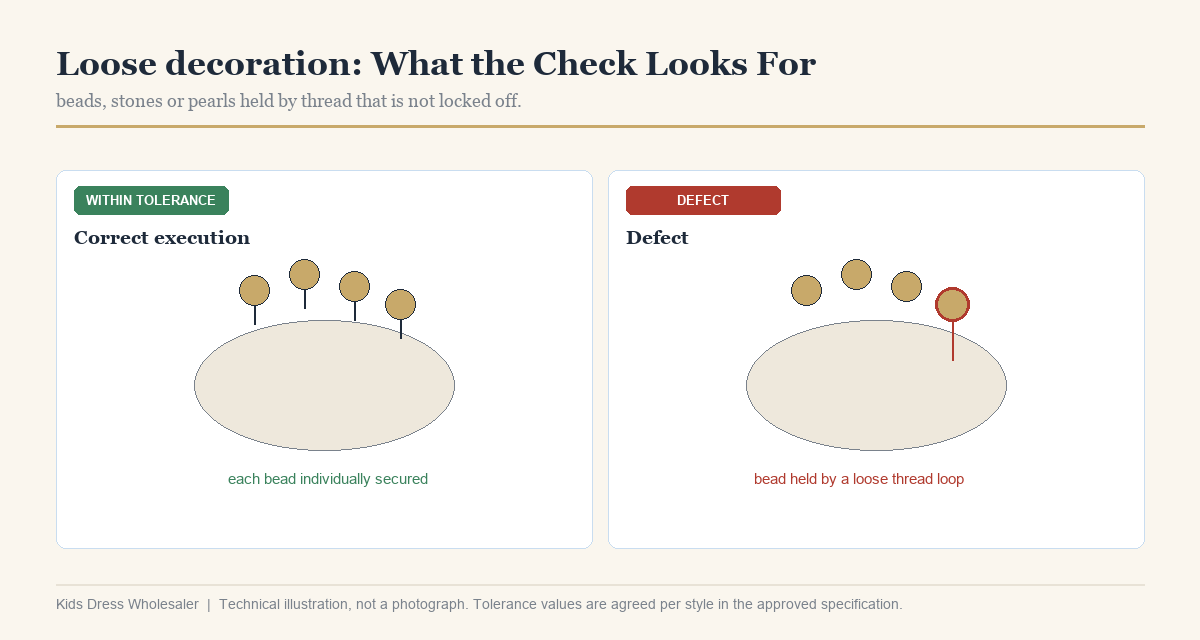
Missing beads
What it looks like. A gap in a bead pattern. A flower without its centre, a bead line that stops and starts, a cluster carrying two beads where the design calls for five. Separately, and more serious, beads seated in the pattern but not properly secured, which come off in a child’s hands. Loose beads rolling in the polybag are the clearest warning that the attachment method is not holding.
Why it happens. Beads sewn with too few passes of thread, or attached with adhesive alone, sit on the surface without real anchorage. Beads applied before the final pressing or washing can be loosened by heat and moisture after they are attached. Beads placed over a seam that flexes each time the wearer sits work free through movement rather than force. In a hand-decorated batch, attachment quality varies between operators.
Factory prevention. Specify the attachment method in the work instruction, down to thread passes and adhesive, and reinforce beads at stress points. Attach beadwork after the main pressing where the sequence allows, reconcile the bead count against the design card at the workstation, and pull-test a sample of beads at quality control. Where a bead could detach and be swallowed, the small-parts requirements of the destination market apply, as our summary of kids dress quality and compliance explains.
Buyer verification. Pull a selection of beads gently, spread across the pattern rather than only at its centre. Open the polybag and check for loose beads before the garment is handled. Compare the pattern against the design card, count by row if the design is structured, and inspect the back of the attachment where it is visible. Check metal-tone beads for sharp edges or burrs, which catch on skin and on tulle.
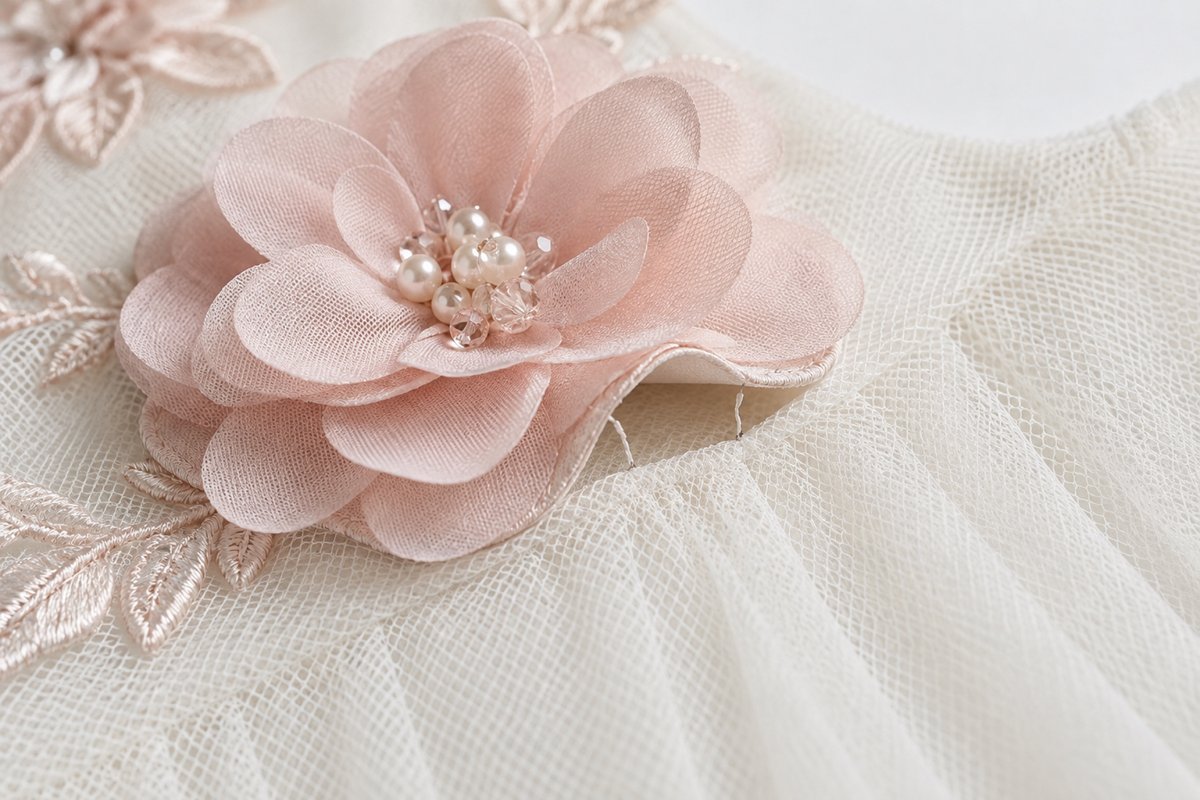
Poor appliqué attachment
What it looks like. Appliqué edges lifting away from the ground fabric, most often at outer corners and pointed ends. A flower or heart sits slightly raised with a shadow beneath its edge. There may be a glossy patch where adhesive pressed through the fabric, and where stitching ran only through the centre of a shape, the perimeter stays unfixed and curls with handling.
Why it happens. Appliqué held by adhesive alone, or stitched with a path that does not follow the entire perimeter, fails at the first point where nothing holds it down. Fusible web that never bonded because of the surface finish on the ground fabric, or heat set too low, leaves pieces attached in appearance only, while heat set too high produces shine and scorching.
Factory prevention. Decide the attachment method fabric by fabric: fused and stitched, stitched only with an edge finish, or backed where the ground fabric cannot hold a stitch. Specify a stitch path following the full perimeter including corners and points, and use a pressing cloth with controlled heat for fusing. Where the ground is tulle, back the appliqué with a matching layer or attach it to the lining beneath, and wash-test the construction.
Buyer verification. Lift the edge of the appliqué gently with a fingernail, at corners and points specifically, and look at the surface in raking light for adhesive shine. Check the inside of the bodice for the stitch line, because a properly stitched appliqué shows a consistent path on the reverse. Where one garment carries more than one identical appliqué, compare them, since an inconsistent path usually means the method was left to the operator.
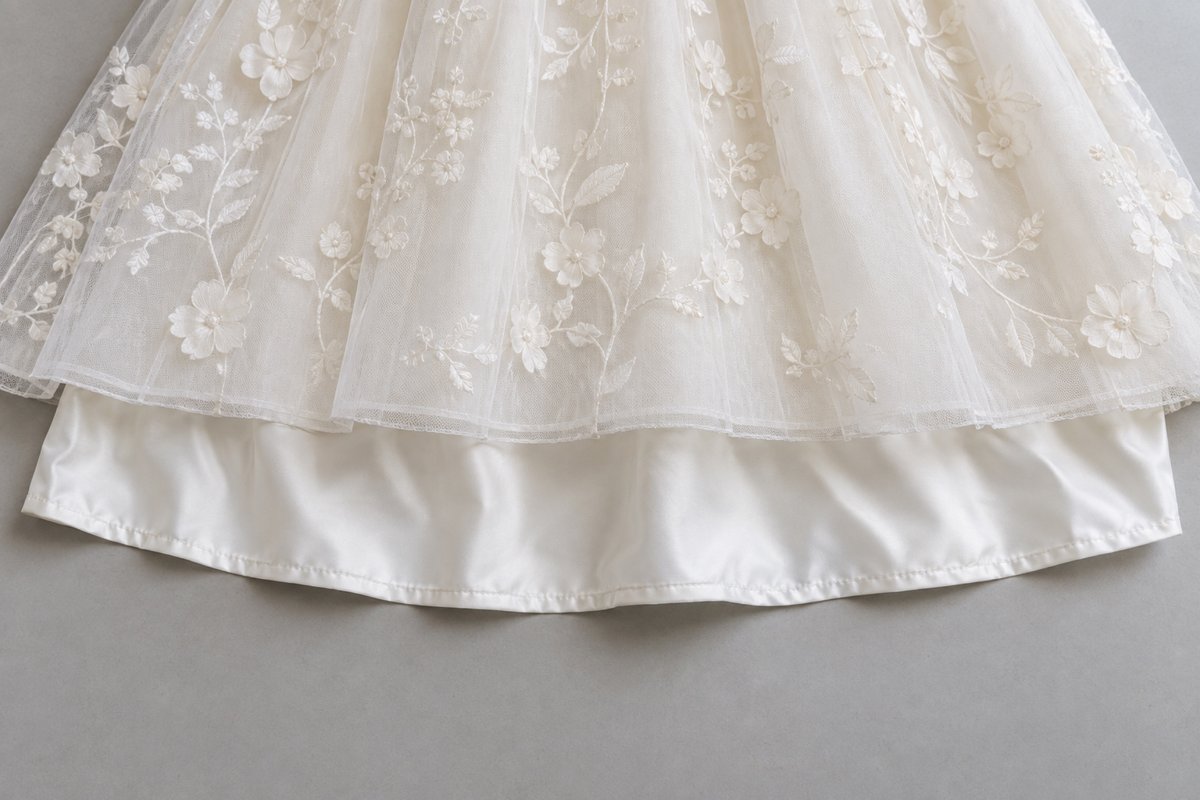
Exposed lining
What it looks like. Lining showing where it should not: below the hem, at the armhole, at the back neckline, or through the shell fabric where the dress is close-fitting or light in colour. On a full skirt, the lining edge may hang below the shell all the way around or only on one side. Through the outer fabric, the effect reads as a shadow across the bodice.
Why it happens. Lining is usually cut at the same length as the shell, and the two fabrics then shrink differently in finishing and in the wash, so one edge travels past the other. Seam allowances that were not enclosed show at the armhole once the garment is worn. A lining attached only at the waist shifts downward as the skirt moves, and a sheer shell designed to rely on its lining needs that positioning decided at pattern stage.
Factory prevention. Cut the lining to the length the shell will actually finish at, based on test results rather than assumption, and enclose or secure the lining edge at the hem. Anchor the lining at the waist, the underarm and the centre back so it cannot drift, and finish the lining seam allowance so it cannot escape. Where the shell is sheer by design, confirm lining placement on a form before bulk cutting.
Buyer verification. Check the garment from the outside first, then from the inside, because a lining problem is often visible from only one of those angles. Look specifically at the hem, the armholes, the back neckline and the base of the zipper. Lift the skirt and see how the lining meets the shell at the hem. Judge it on a form, since a lining that sits correctly on a hanger can drop out of position when worn.
Skipped stitches
What it looks like. Short gaps in a stitch line where the needle missed one or more stitches. Along a structural seam it reads as a small weak point that opens under tension; along decorative topstitching it reads as a broken, dotted line. From the inside, the stitch may be present without being interlocked, which makes it invisible to a quick look and obvious the first time the seam is pulled.
Why it happens. A blunt or wrongly sized needle, thread that is a poor match for the needle’s eye, or a machine with a timing or clearance issue all cause the needle to miss the loop. Skipped stitches cluster where the fabric is thickest — the waist seam, the zipper base, an armhole junction, a point where trim meets shell — because the presser foot rises and the needle deflects.
Factory prevention. Change needles on a defined schedule and match needle and thread to the fabric rather than to what is already on the machine. Slow the machine over crossing seams and thick junctions, and hand-wheel through the heaviest points where the operator can feel resistance. Confirm the hook timing when skipped stitches appear on more than one machine or shift, since that indicates a machine fault rather than a fabric one.
Buyer verification. Find skipped stitches by pulling a structural seam gently along its length and watching for the line to open. Check the junctions first, because that is where they cluster. Because skipped stitches follow machines and operators, check the same seam on several garments from one carton before drawing a conclusion, and ask your inspector to record which machine produced the pieces where that information exists.
Incorrect measurements
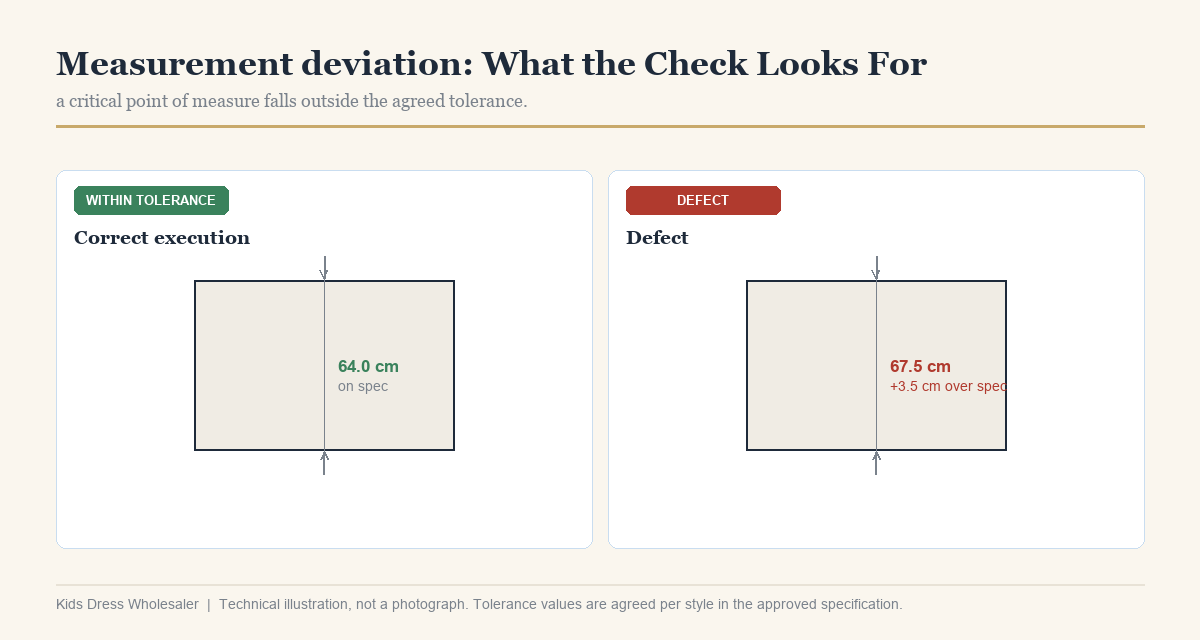
What it looks like. The garment does not match the specification. Chest width, waist, sleeve opening, bodice length or skirt length sits outside the tolerance on the spec sheet, sometimes in only one size of the range, and sometimes in a garment whose label is correct while its measurements are not, so a dress labelled one size measures into another. The deviation is either consistent across the lot or scattered, and which one it is tells you where it started.
Why it happens. The error is usually introduced before the first stitch. A spec that describes body measurements rather than garment measurements guarantees a mismatch. A pattern graded mechanically without adjusting individual points drifts further from the intent at the ends of the range. Shrinkage that was never built into the cut dimension arrives as a short garment after finishing. Mixed pattern versions still in circulation, or a block shared across sizes that was never re-checked, produce the same confusion.
Factory prevention. Agree the measurement spec, the tolerance and the measuring method before cutting, and lock the pattern version so production works from one source. Build known shrinkage into the cut dimension and measure the first pieces off the line in a relaxed, flat state. Measure graded sizes against the base size rather than assuming the grade is even, and train the inspection team on the agreed method.
Buyer verification. Measure to your own stated method, on a flat surface, with the garment relaxed and not hanging. Measure more than one piece per size and more than one size, then compare readings against your spec rather than against the sample. Note where the deviation sits: a consistent deviation across the lot often points towards a pattern, specification or cutting issue, while scattered variation more often suggests production or process-control inconsistency. The pattern is a strong signal, not a verdict — confirm it against the cutting record before assigning cause.
Poor neckline symmetry
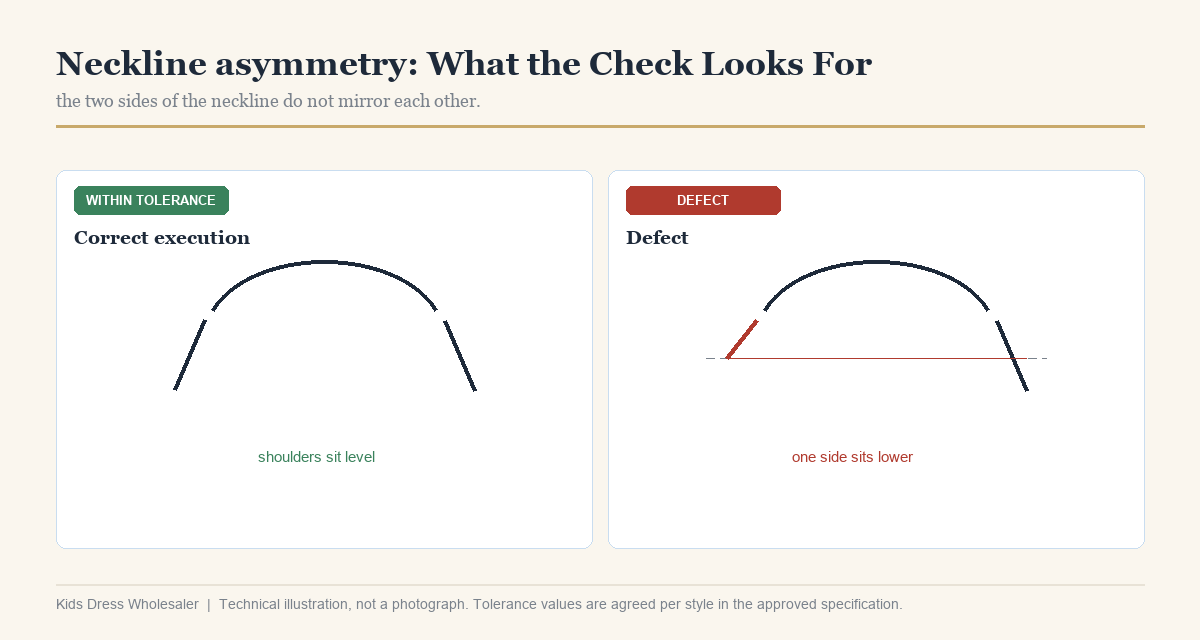
What it looks like. One side of the neckline sits lower than the other, or the two curves read differently. Shoulder straps sit at different heights. A bow, a trim band or a row of pearls is off centre, or a centre-front seam leans to one side. It is often subtle in the hand and unmistakable in a front-on photograph, which is how your customer first sees the dress.
Why it happens. Left and right pattern pieces cut from a single layer rather than mirrored produce a small difference that assembly amplifies. Trims placed by eye from one side rather than from the centre front shift the design. Where the fabric has a visible surface direction, matching the two sides wrongly reads as asymmetry even when the cut is accurate, and checking the neckline flat on a table hides all of it.
Factory prevention. Mirror the pattern pieces and verify symmetry at the pattern stage before cutting. Mark the centre front on every panel and place trims outward from that mark rather than inward from the shoulder. Press both sides under the same conditions and check the neckline on a form with a marked centre line. A simple symmetrical template at quality control catches the small deviations the eye forgives on a table.
Buyer verification. Fold the garment along the centre front or hang it on a form, then measure from each shoulder seam to the matching neckline point and compare. Check the trim’s position against the centre line rather than against the shoulders. Step back a few metres and look at the front, because asymmetry reads more clearly at distance and through a camera than it does up close.
Tulle snagging
What it looks like. Pulled threads in the netting, usually appearing as drag marks where a thread has been lifted out of the mesh, or as a small run across the surface. Damage reads as a shadow on pale tulle and as a pale line on dark tulle. On a full skirt, snags cluster where the tulle touches something rough, and they are easiest to see when light passes through the layer rather than across it.
Why it happens. Tulle is a fine mesh with very little resistance to friction, and the workspace around it is full of things that catch: the teeth of a zipper hanging beside it, the rough edges of beadwork or sequins, hanger hooks, packing clips, and the operator’s own hands, rings and jewellery. Many snags occur during packing and transit, which is why a piece that passed final inspection can still arrive marked.
Factory prevention. Smooth every surface that touches tulle during production and packing. Cover zipper teeth, protect beadwork with tissue, use padded hangers or fold with a soft interleaf, and keep jewellery away from the tulle layers. Finish seams that sit under the tulle so no raw edge can catch it. Inspect tulle once more after final pressing and pack immediately after that inspection so nothing reintroduces friction.
Buyer verification. Examine the tulle under bright light from more than one angle, since a lifted thread shows in transmitted light and disappears in raking light. Look first at the areas most likely to be affected: the outer skirt layer, the back panel and the hem. If snags appear after unpacking, photograph the garment in its packaging before handling it further, because transit snagging is a claim your supplier can only support if the evidence exists at the point of unpack.
Incorrect label
What it looks like. The label does not match the garment. A size label that does not correspond to the measurements, a fibre content contradicting the material, a care instruction describing a different fabric, a missing country of origin, or a brand label present while the care and content label is absent. Placement counts too: a label sewn through the outer fabric or sitting where it scratches skin is a defect even when the wording is right.
Why it happens. Label copy is written early and materials change later, and the two are not reconciled. A corrected version of the label exists while an older batch is still in the packing bin. Several sizes are packed at one station from unlabelled piles, and labels are applied from the wrong stack. Care instructions are printed as a general template rather than for the fabric actually used.
Factory prevention. Lock the label copy against the final bill of materials, so any approved material change forces a label review. Approve a physical label card with wording, placement and material, and treat labels as a controlled item with a version number. Check the label at the start, the middle and the end of packing, since a wrong label usually enters the run part-way through.
Buyer verification. Read the label, then read the garment. Check fibre content, care instruction, size and country of origin, one field at a time, against your final bill of materials. Measure the labelled size to confirm label and measurements agree, and compare labels across sizes and cartons, because a mislabel usually affects one size or one packing window. Where the destination market sets labelling obligations, responsibility for the correct finished label sits with the importer.
Packing deformation
What it looks like. Dresses arrive flattened, creased or misshapen. Tulle skirts press into flat discs, dimensional flowers and bows are crushed beyond recovery, a hard fold line crosses the skirt, bodices lose their shape, and hanger marks or pressure ridges sit on the shoulders. Some of it improves after hanging, while a fold pressed into tulle over a long journey often does not.
Why it happens. Compression is the main cause. Too many pieces in an undersized carton, a fold placed across the fullest part of a skirt, weight stacked on decorated bodices, or no support at the fold points. Packaging materials contribute: bags too small for the garment, insufficient tissue or board, and thin plastic that collapses under stacking. Heat and humidity during shipping soften the fabric and let compression set.
Factory prevention. Define the packing method per style rather than per order: where the garment folds, what supports each fold, whether it ships on a hanger or flat, and how many pieces fit a carton without pressure. Protect decorated bodices from anything stacked above them, use tissue or board at fold points, and choose a bag that holds the garment without forcing it. Pack and unpack one finished piece as a test before the order ships.
Buyer verification. Open a full carton rather than a top-layer sample, and photograph the contents as they come out. Hang the garments and give creases time to drop before judging, but record which defects were present while the pieces were still compressed. Check the bottom of the carton specifically, and check cartons from different positions in the shipment. Crushed decoration is the least recoverable of these defects, so inspect and count it first.
Ready to move forward?
If a shipment has arrived with a defect you cannot name, send a photograph taken with the garment flat and a ruler in frame, plus the size and the point of measure if it is a measurement issue. Naming the defect correctly is most of the argument, because it tells the factory which process to correct rather than which inspector to blame. Our quality and compliance page covers the inspection structure these checks sit inside. Typical figures as of September 2026, for planning only: ready stock on selected styles from 6 pieces, custom orders from 200 pcs per style, sampling 5–7 days per round, bulk production 25–40 days after sample approval, and pattern or sample development USD 80–150 where no pattern exists. Exact MOQ, development cost and lead time depend on style, fabric, quantity and season.